Here's how to make an origami flapping bird.
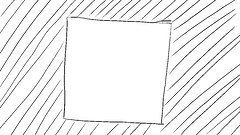
Start off with a square of paper, I use post-it notes cos I hope one day they'll pay me lots of money or hire me to be some kind of brand person.
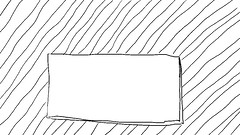
You're going to want to fold it in half to make a big old rectangular shape, try to make sure the corners line up proper.
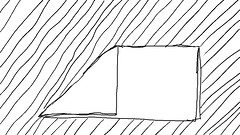
Then fold down one of the folded corners so you get a diagonal crease from the flappy corner to the middle of the top ridge.
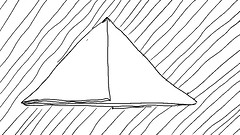
And do the same thing on the other side to make a big triangle with lots of paper edges on the bottom.
This bit's kind of complicated, you're going to want to open up the bottom and squash the whole thing into a square. I have faith in your intelligence dear reader, and faith in your spacial awareness and dexterity. Good luck.
Now fold up the two lower edges to make a kind of kite shape.
Turn it over and do the same thing again.
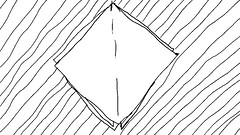
You now want to undo those kiteish folds so we're back to that square thing again. If you want to pursue a career in origami in the 80s and 90s then you'll need to know that this fold is called the 'Preliminary base'
Now some more pre-creasing, can you fold down the top triangle so that its like the cross bar of the kite-like fold we did earlier.
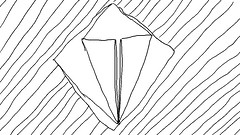
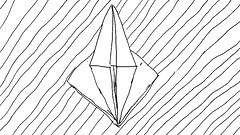
God knows how to explain this next operation, we're just using all thse pre-creases to open up the Preliminary base and make a bit old diamond shape.
If you managed that without any problems, turn the paper over and do the same thing again. Again if you were to pursue a career in origami in the last century, you'll need to know that this diamond thing is called a 'Bird base'.
You're doing well, with this level of expertise you could probably pass for a children's entertainer or a classroom assistant. Lets pretend what you have before you is an open book, with pages on the left and right, what we want to do is turn to the previous page. And then turn over the whole piece and do the same thing.
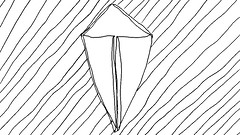
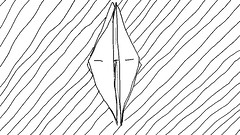
The two sticking up bits will become the neck and the tail of the bird, lets gently pull them apart a wee bit, this will cause the body to open up a bit, that's fine, just squash it flat again.
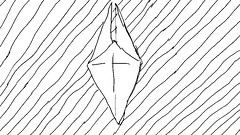
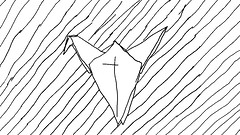
Almost finished, what you need to do now is fold down the head part. Again the neck will open up a wee bit, no worries, just squash it flat when you've got enough of a head.
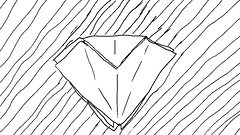
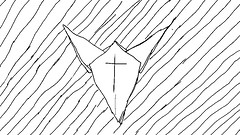
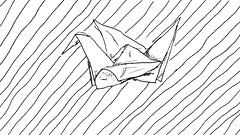
That's you done, you just need to spread the wings a wee bit to make it more like a bird in flight.
Now, a few important things to note.
- Its not a crane, its a flapping bird, the crane is something a tiny bit different
- This is probably your first attempt, so it'll look crap, try it again and be more precise with the creases
- Also, it probably isn't going to flap, it takes some degree in engineering to get these things to flap like they're supposed to, it'll probably just tear if you try to make it flap
- If you really want to try to make you 'flapping bird' flap it's wings, hold its 'breast' (the bottom of the neck, pinching just a little of the wing) and pull the tail outwards
thanks for the instruction on how to make this origami flapping bird, it will make me popular among my children!
ReplyDeleteAmazing Work!
ReplyDeleteBest of luck. keep doing
I have few service related to your work
Check Here
Thanks